lpine Golf Course opened in 1967 and was the first course designed by architect Mark DeVries. Alpine Golf Course is located on 120 acres just north of downtown Grand Rapids. DeVries went on to do 20 facilities in the area with his last course being Boulder Creek before passing in 2012.
.jpg)
.jpg)
The first Greens Superintendent at Alpine Golf Course was Larry Murphy. Larry was involved with the construction of the course and went on to handle the grow in and ongoing maintenance of the course.
The torch has now been passed on to Larry's son Mark. Mark comes to Alpine with 40 years of experience as a Superintendent. We are thrilled to have him on board for our upcoming 2020 season.

When checking in for your round of golf. be sure to grab one of our free course guide books.

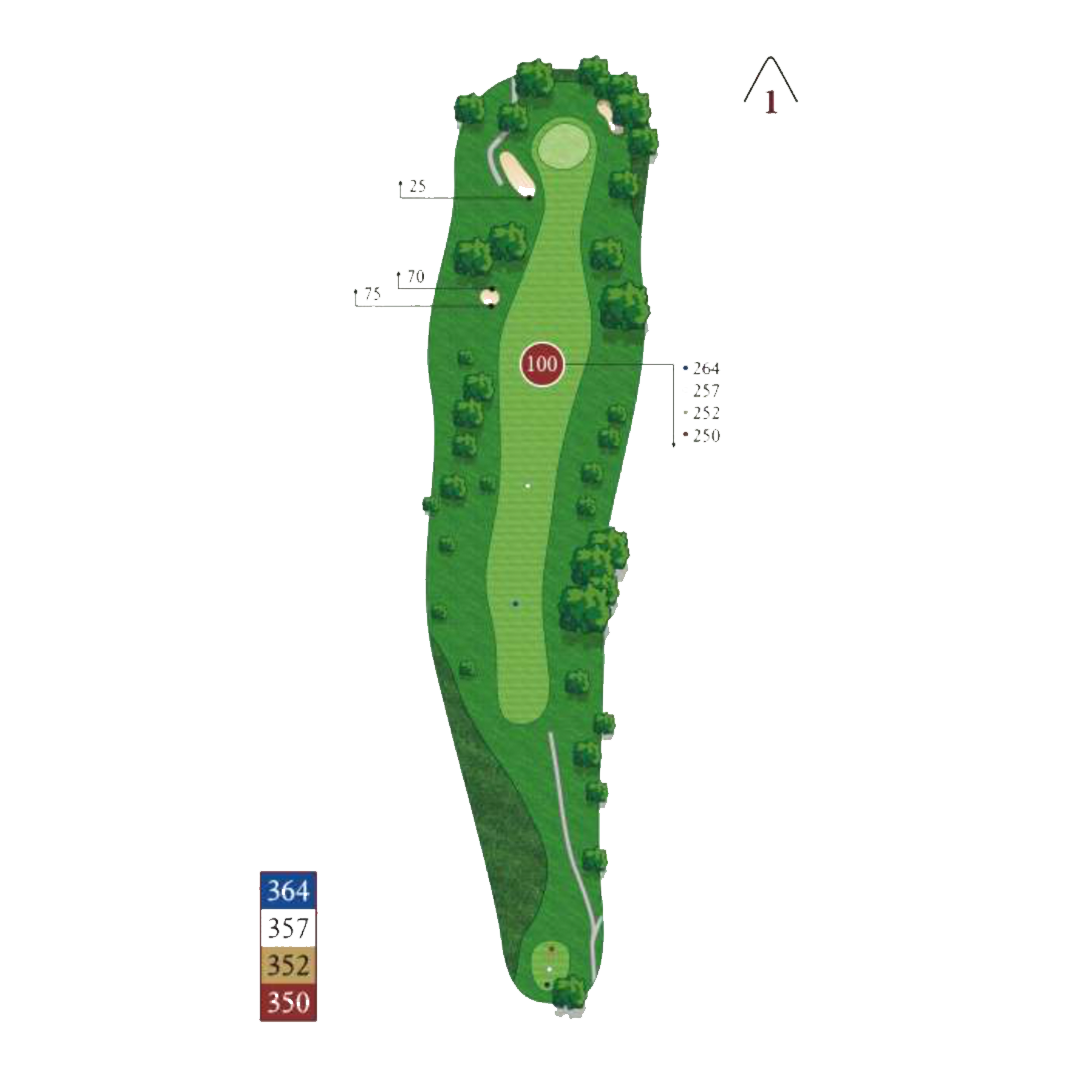
Welcome to Alpine Golf Club. To start off, a nice easy opening hole, a handshake if you will. Favor the right side of the fairway for a short approach to a generous green. Avoid the left bunker and going long for your first par of the day.
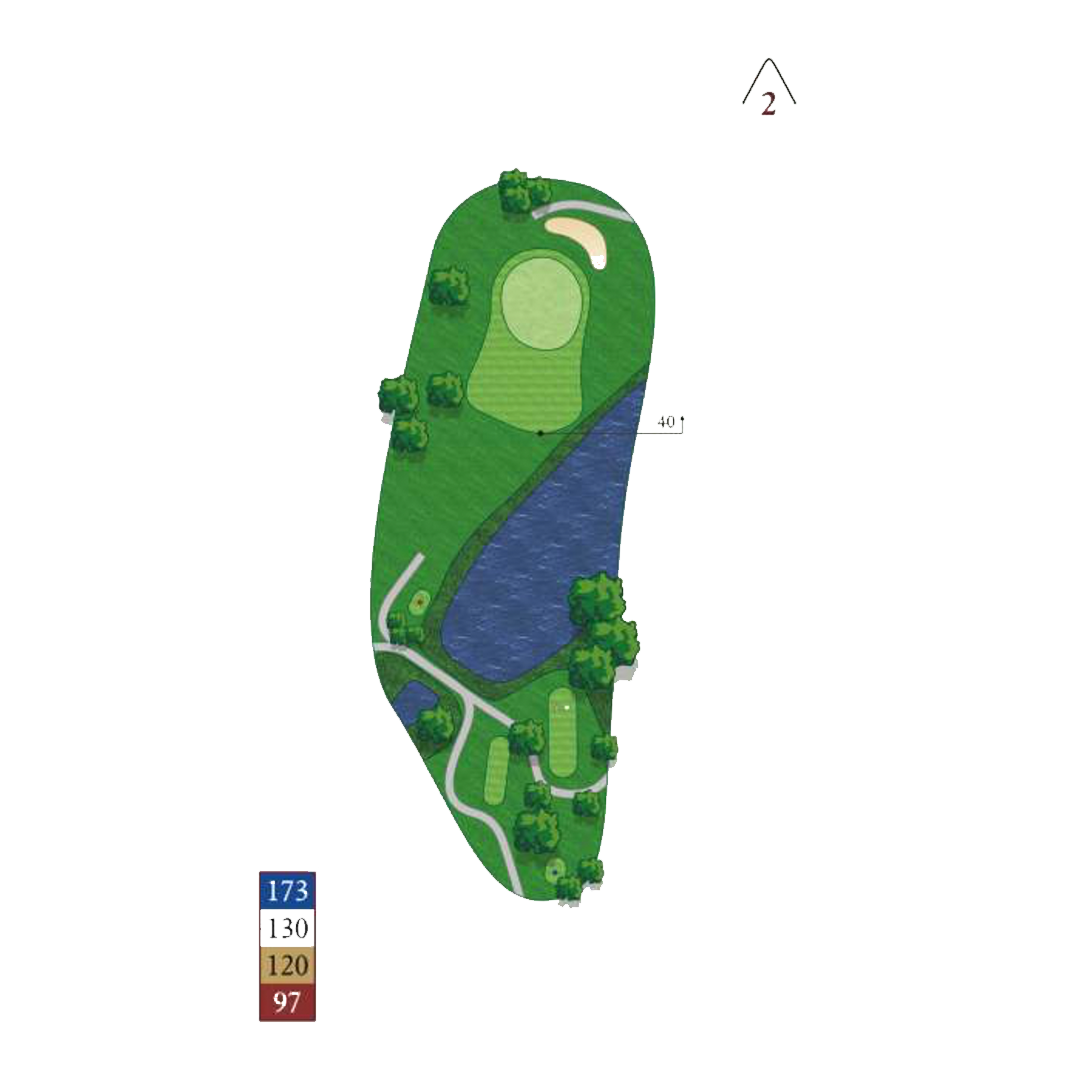
A straight forward par 3 with an easy water carry. Be careful of the prevailing west wind in your face as it is known to knock a ball down and into the water right of the green.
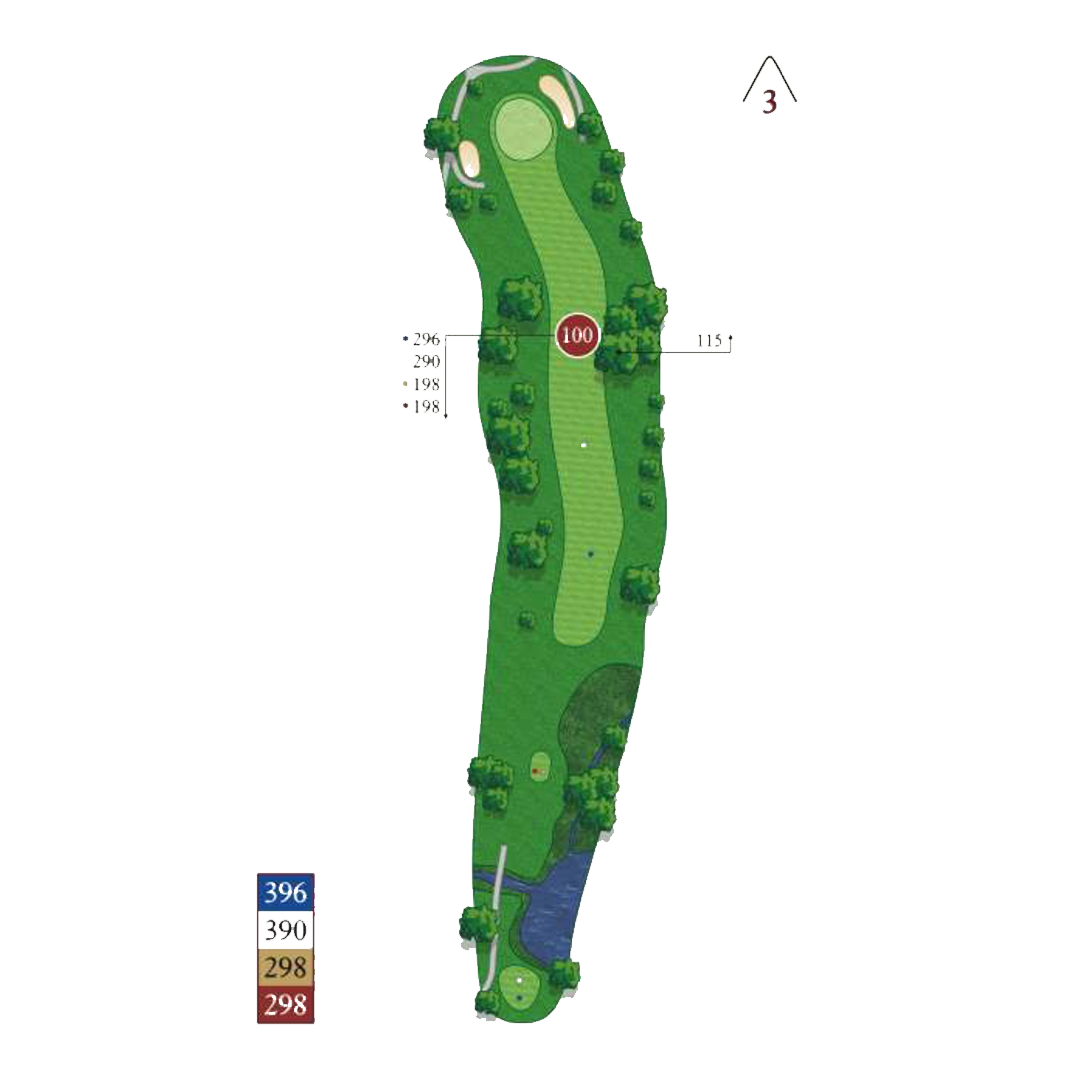
A challenging dogleg left par 4 with a fairway that slopes left to right. A draw off the tee down the right side will give you the best look at the elevated green that slopes heavily back to front.
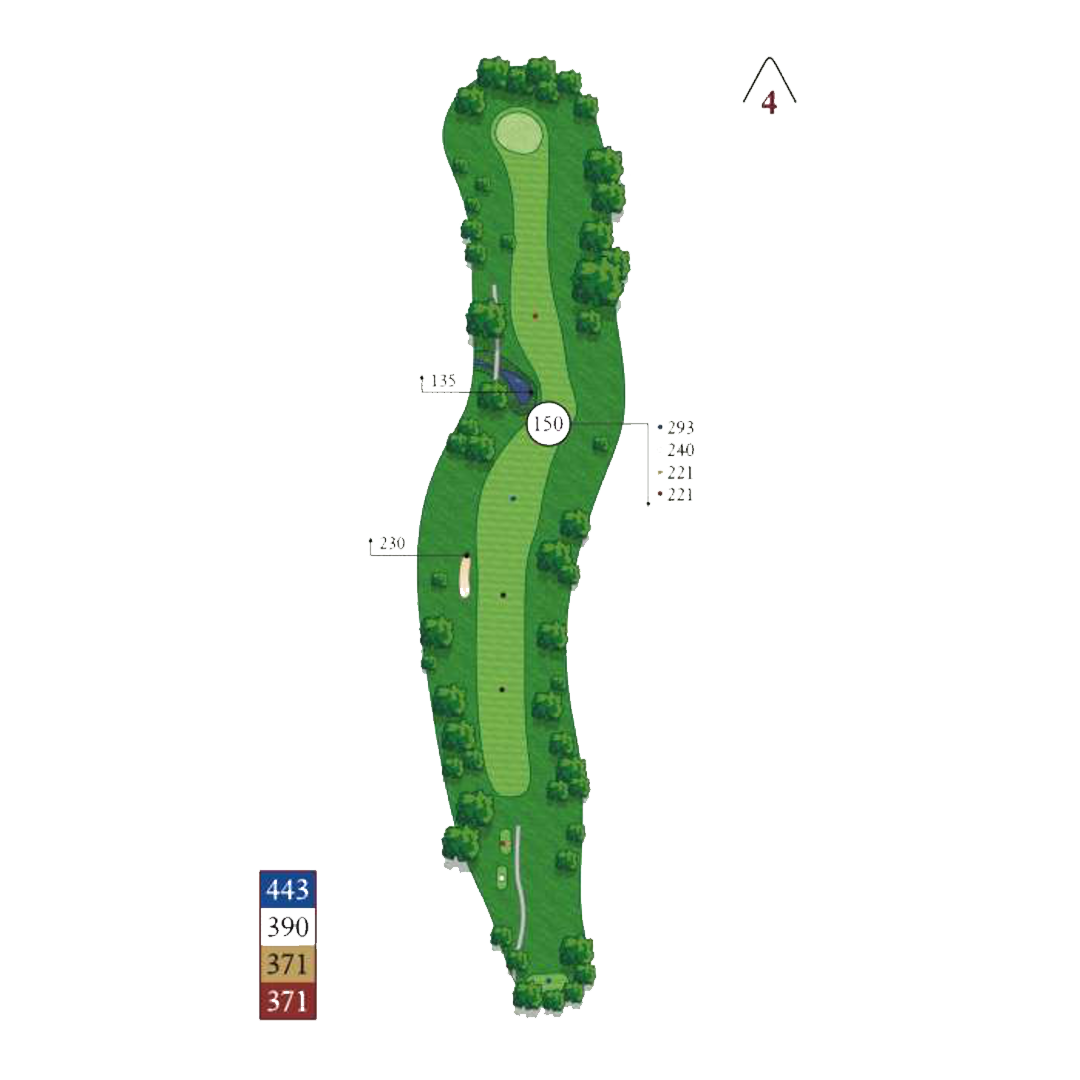
The number one handicap hole on the front side. Long hitters need to avoid the water hazard that comes into play down the left side. Lay up too far back, however, and you’ll not be able to reach the green. A long fade off the tee down the right side will give you the best chance to reach the green.
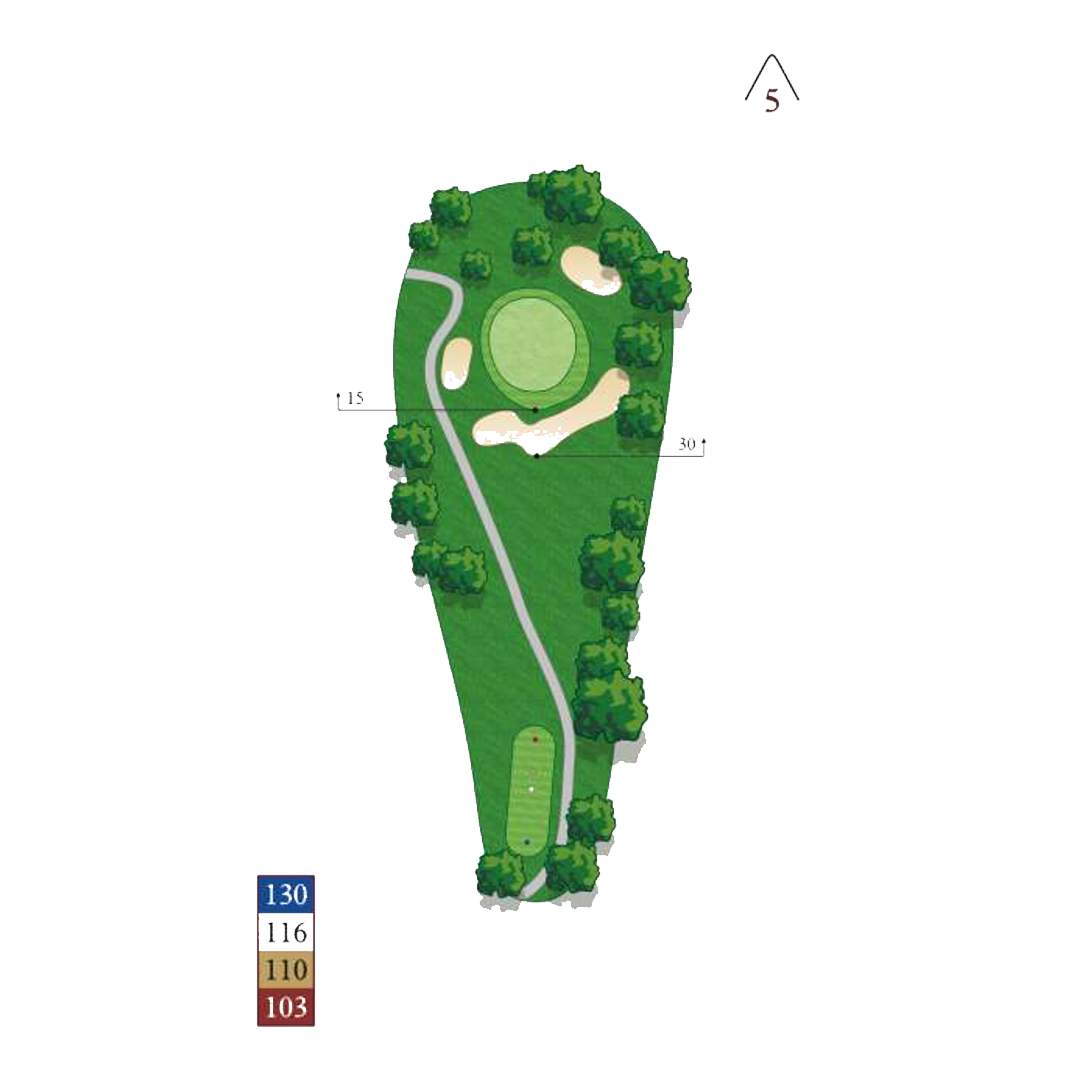
A short but well-protected par 3. The green slopes from back to front and from right to left. Pay attention to the pin position here.
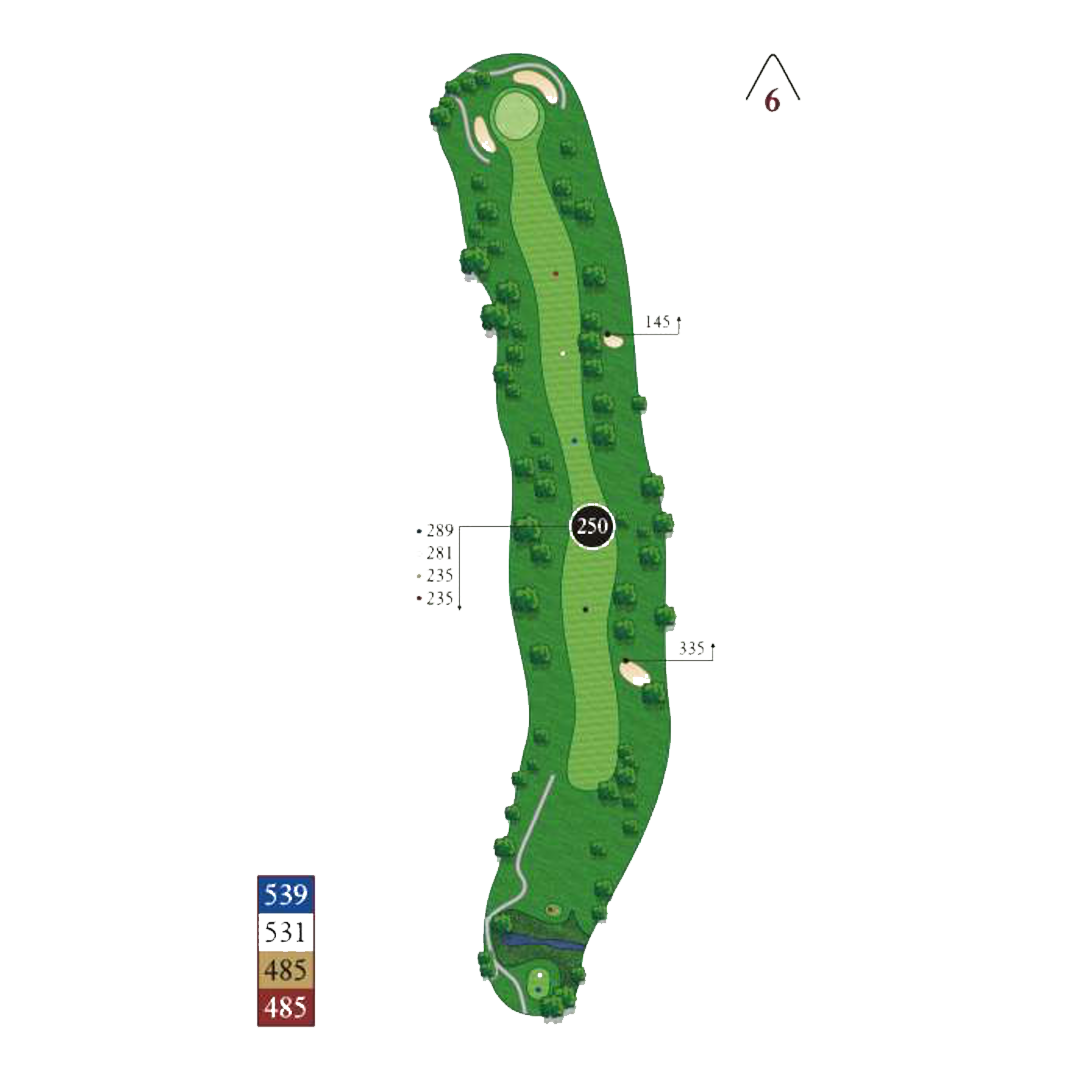
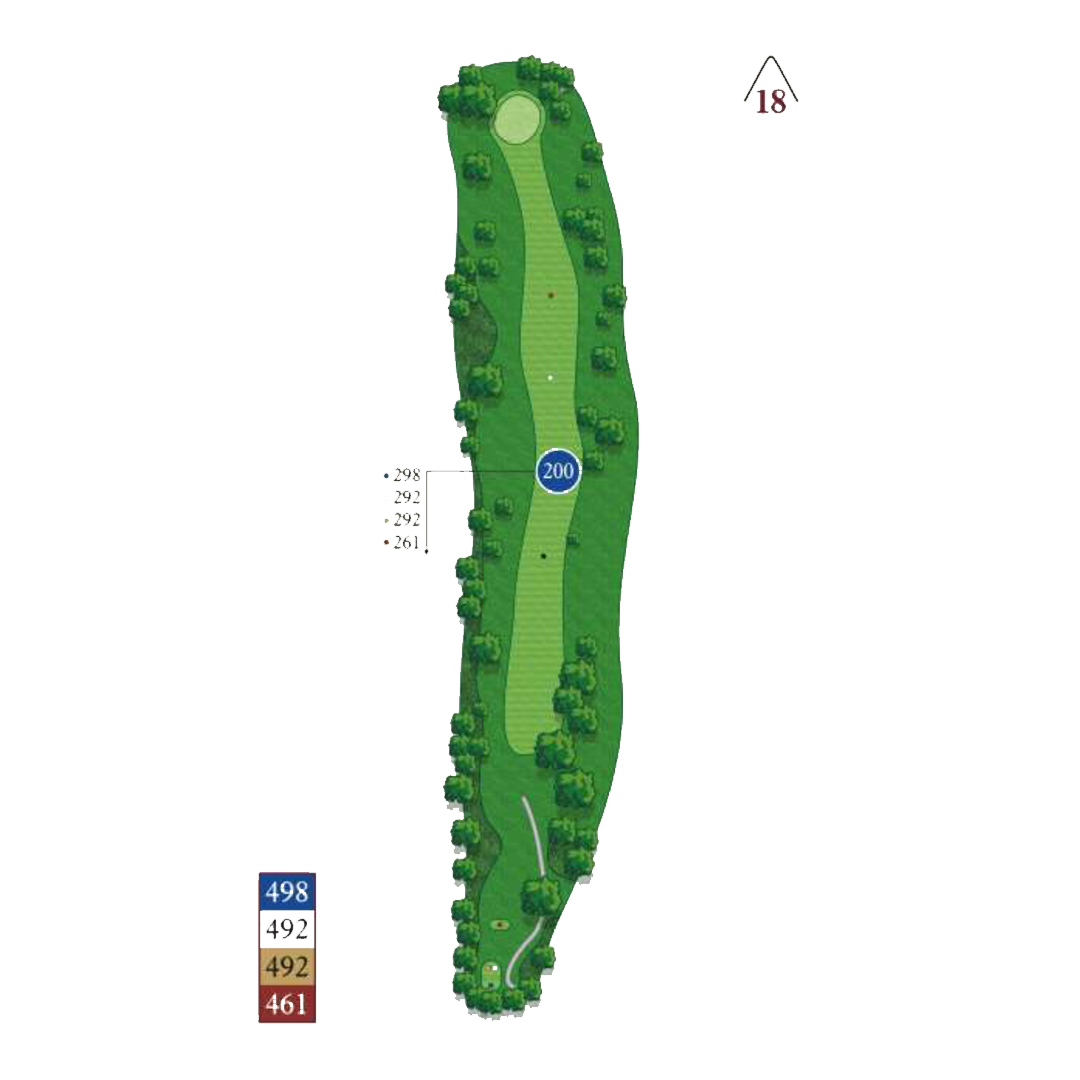
The longest hole on the course so give it a rip. Avoid the fairway bunker on the right and you’ll be left with a long second shot up and over the hill. There’s nothing in between you and the hole so we recommend giving it all you got. This is one of the largest greens so make sure to knock your third shot close.

Good chance to pick up a stroke here on this short par 5. Keep it down the middle on this tree-lined hole for a chance to get home in two. The green sits farther to the right than it looks so a nice long fade on the second shot will do the trick.
The tee box sets you up looking down the left of this dogleg right par 4. There is plenty of room to the right, so avoid driving it through the fairway on the left side. You should be able to drive over the tall fescue that covers the hillside, leaving a short iron into the green.
Accuracy off the tee is a must, with out of bounds to the right and fescue on the left. Favor the left side of the fairway as is slopes left to right after you clear the hill. Make sure to get the correct yardage on your second shot, it’s downhill but also usually into the wind.

A challenging downhill par 3 to one of the smaller greens on the course. No bunkers, but avoid the trees that creep in on the left and right side. The smart play is the front of the green or even a bit short.
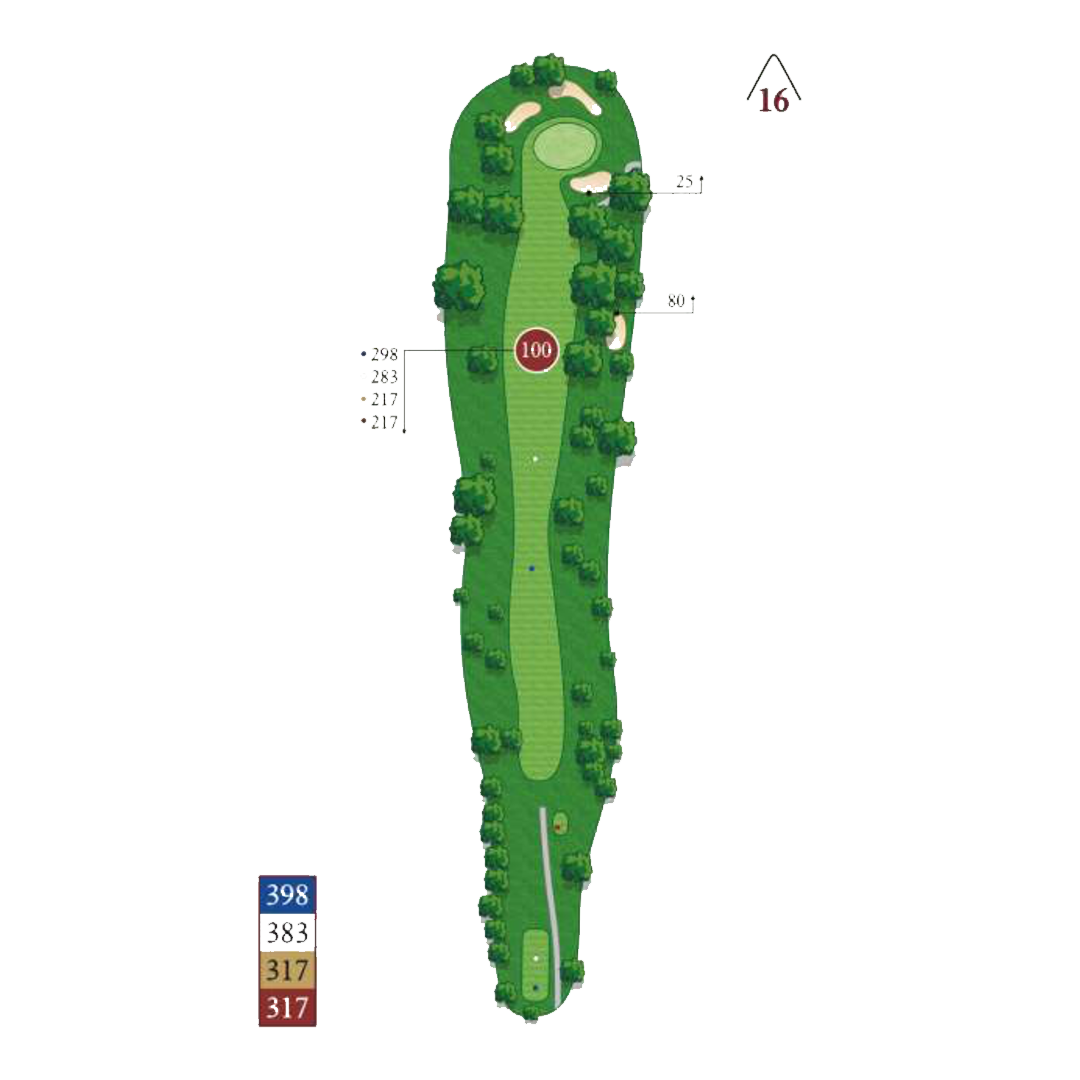
Keep it down the left side on this long challenging par 4. Trees will block out any shots that are to the right side of the fairway or right rough. Avoid going long over the gree. Short right is a good spot to get up and down from as the front left is guarded by a deep bunker. Par is a great score on this one.
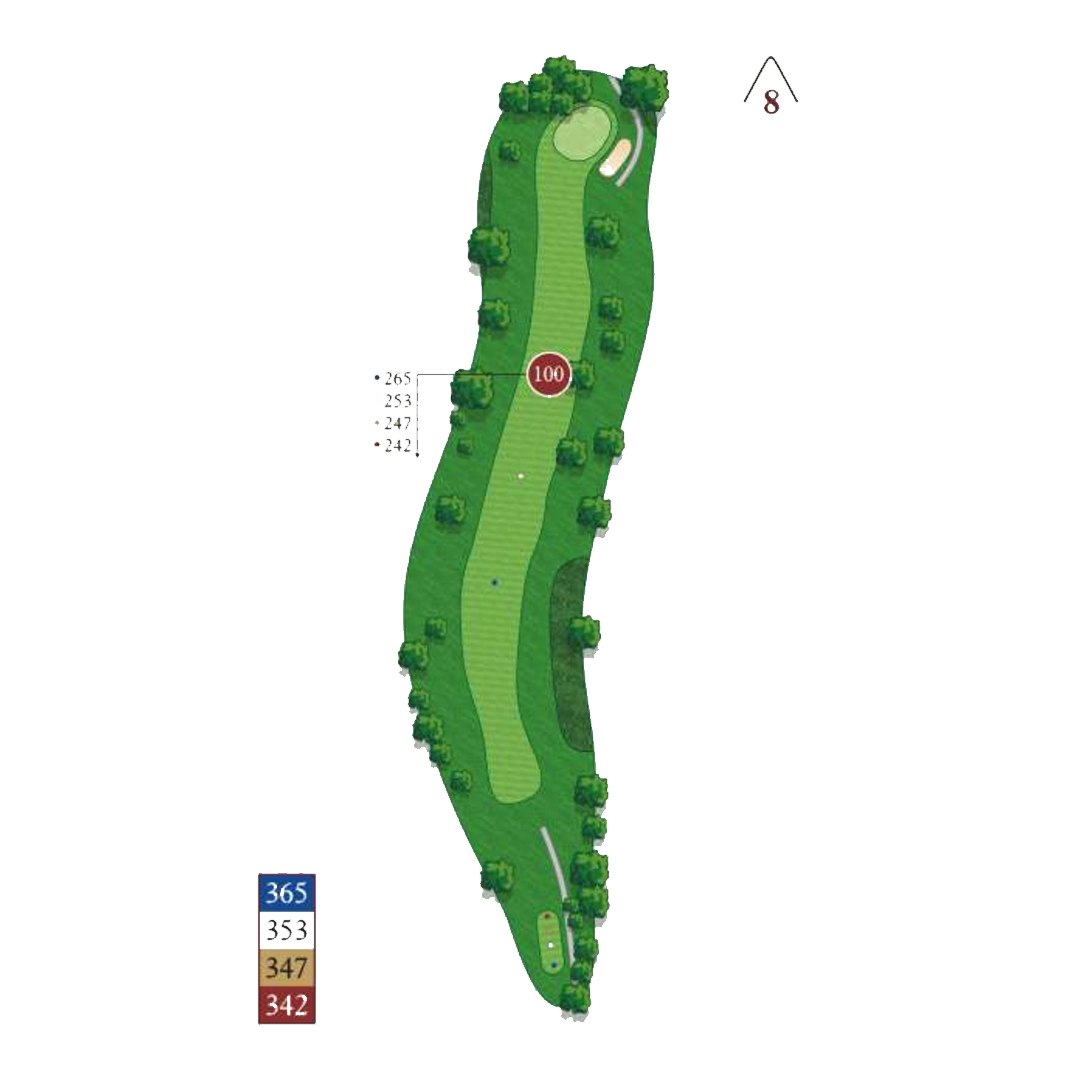
Now it’s time for some fun! This drivable par 4 gives you a chance to make it home in one. Eagles fly here but watch out for those big bunkers on the left. Mr. Double Bogey lives here as well.
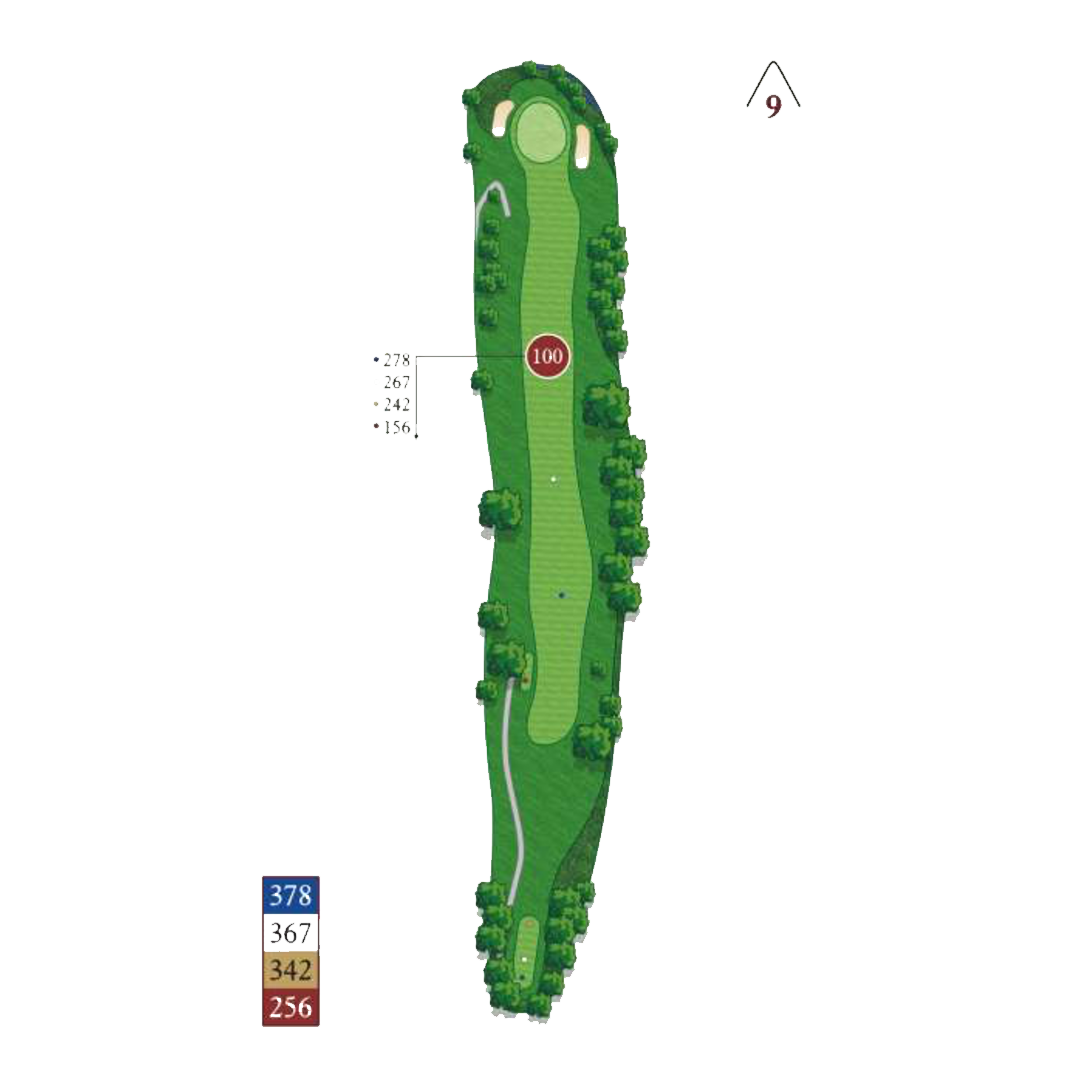
A tactical par 5. Start with a drive down the right side, giving you a slim chance of getting home in two. If it’s out of reach, remember the green is elevated so lay up far enough back to not get pinched in by the overhanging trees. The green slopes heavily from back to front, avoid going long.
Straight away with a generous landing area. A good tee shot should give you a short iron to this well-bunkered green and a birdie opportunity.

Plenty of landing room between the two fairway bunkers. A well-hit ball will also get the benefit of a downslope in the fairway. The green slopes from back to front and left to right. Keep it below the holes for a chance at birdie.
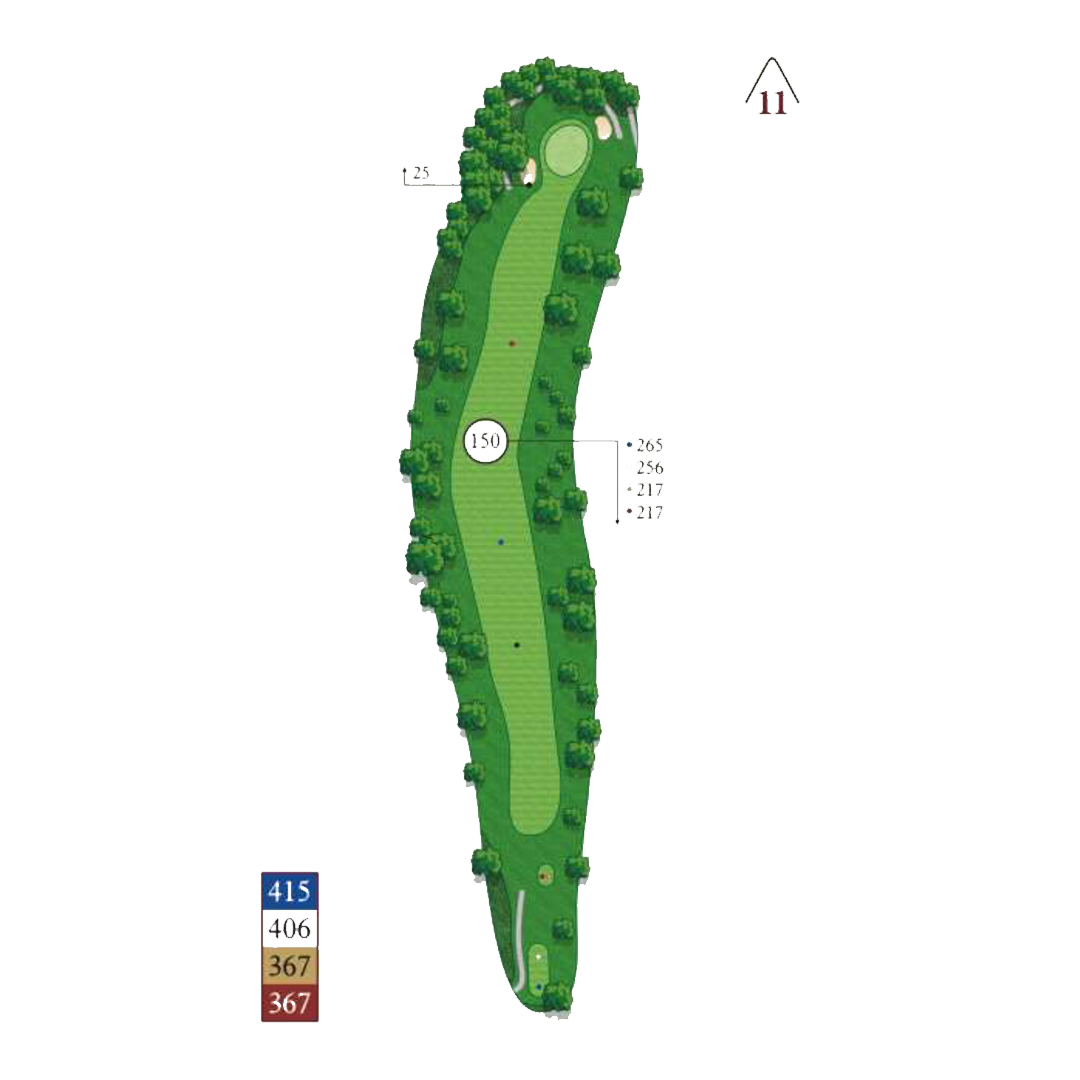
The number one handicap holes on the backside. Hazards on both the right and left sides creep in at the landing zone. Long hitter should be able to fly it past this pinch point with a well hit tee shot. The left side of the fairway will give you the best angle of approach into the green. The second shot plays a little longer than it looks, avoid the bunch short.

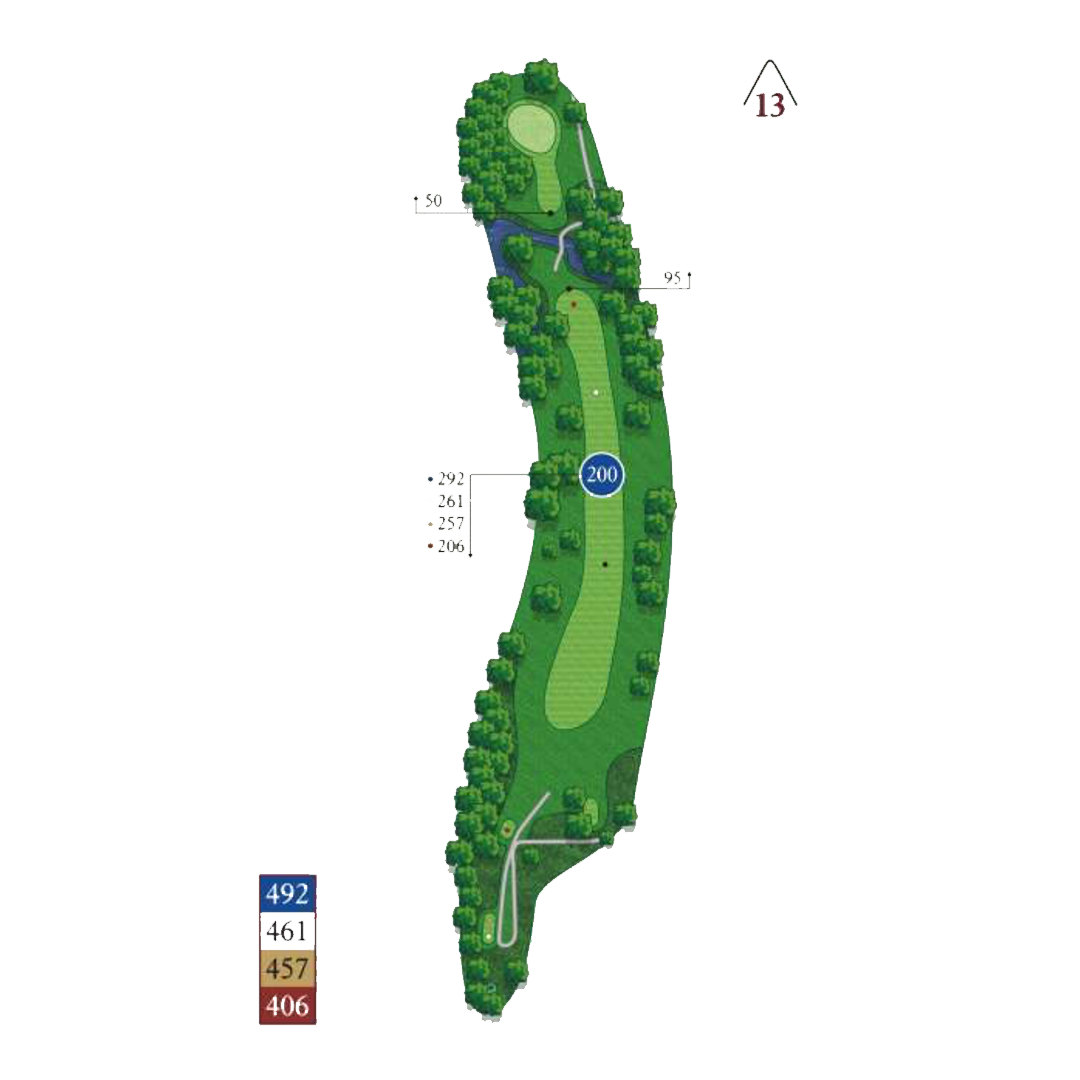
A deceiving par 3. The large bunker to the left is well short of the green. Pay attention to the wind as it players due west and an extra club is usually necessary. The green slopes from left to right.
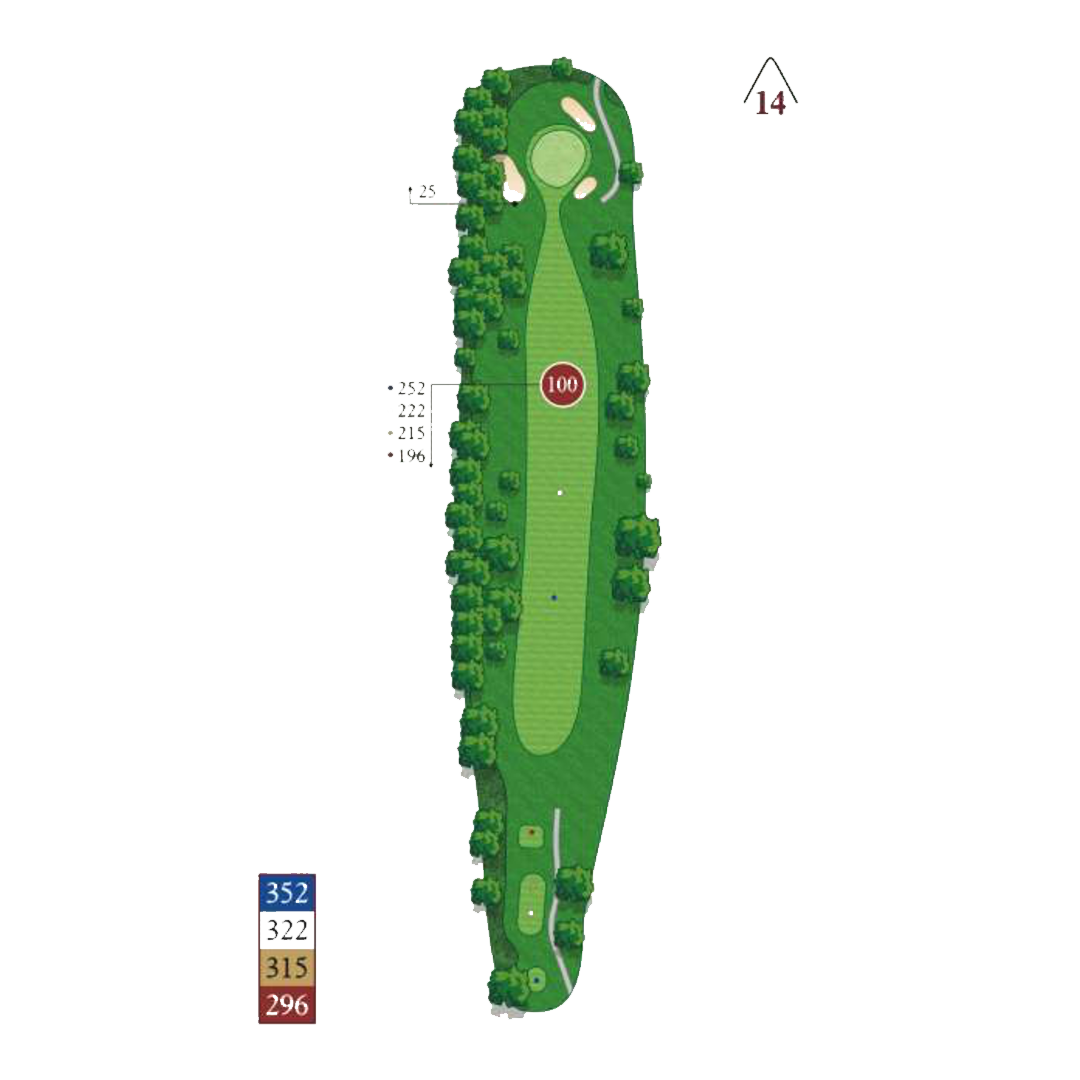
A good driver hole, with plenty of room in the landing area. It’s all uphill from here with the fairway sloping from left to right. A draw up the left side is the perfect shot and should leave you with a short iron into a large putting surface. The short iron will play longer than it looks due to the steep incline. Pro Tip: Aim at the top of the flagstick.

We've got a rotating selection of 8 beers on tap along with 30+ cans. If something on the rocks sounds good, we've got a full bar as well.
If you worked up an appetite making so many birdies, we've got homemade deli sandwiches that hit the spot every time. Our chili dogs are also a go-to favorite!


.jpg)
.jpg)


.jpg)
.jpg)
.jpg)


